Flowing Water
So you have found a nice waterfall or river and you want your photos to look a bit more “artsy” than usual. The trick is a slower shutter speed. You want to show some movement not a static frozen image.
Below is a standard auto program photo of Madison Falls in Olympic National Park from June 2012.


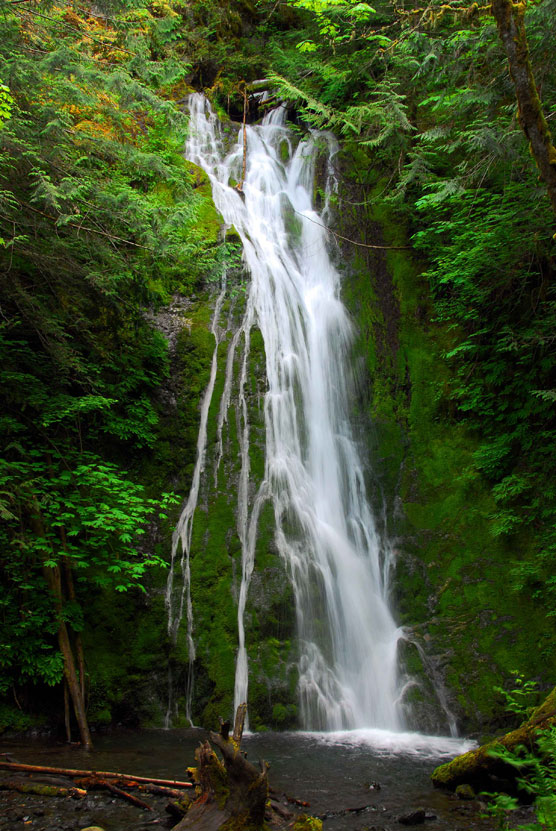
The camera chose a shutter speed of 1/400 of a second. Kinda boring. Not what it looked like in person. I did not have my tripod with me so for the next shot I chose a shutter speed of 1/8 of a second. Just set your camera to shutter priority and spin the dial. 1/8 is about the slowest I would do handheld and that is with a vibration reducing lens. See the difference?
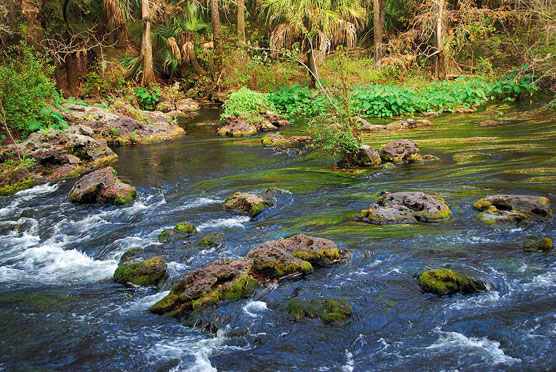
That is closer to what it looked like to my eyes. How about a more extreme example? OK, I have one. When I was hiking some trails in Hillsborough River State Park in Florida last December I came across their famed rapids (Hey, when the tallest mountain in South Florida is 86 feet you take what you can get). And I brought my tripod with me. This photo was shot at 1/500 of a second.

Next I put my camera on a tripod and changed the shutter speed to one second.
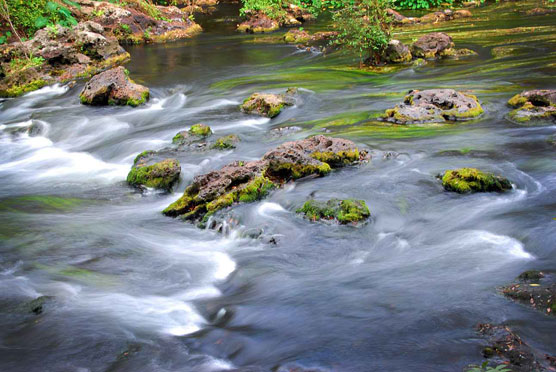
Big difference between the two. Maybe too much. But you get the idea. Experiment with the shutter speed and you will get results that will make your friends jealous. The last photo below is from Silver Falls State Park in Oregon this past summer. I broke my own rule and shot it at 1/2 second handheld, but I was bracing myself against a railing. The background is a little out of focus but the movement of South Falls is clearly shown.
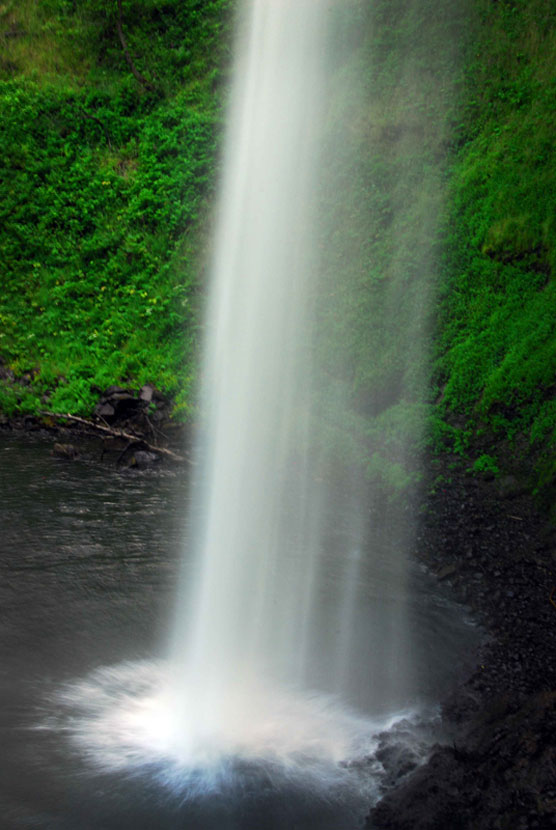

Yeah, that was from behind the waterfall. One of my favorite campgrounds.
Regards, Park Ranger
No Comments
Visit full-site to leave a comment