HDR Photography
Recently Kimberly Shawn Reeves asked us a great question on our facebook page:
Your images are really cool! They look like you have increased the ISO to give a grainy appearance which is really nice. But there is something else that you’ve done that I can’t identify. Almost makes them look like a cross between a painting and photo. Do you mind sharing your secrets?
Our answer from expert photographer Greg Wood:
The quick answer is that I use a program called Photomatix Pro to process a RAW image file into a pseudo HDR (high dynamic range) photo.
The long answer requires a bit of an explanation. Imagine you are outside looking at a nice view of a lake. Let’s assign the darkest shadow area in which you can still see detail the number 1. Give the brightest area with detail the number 15. That is the dynamic range, also known as EV (exposure value), 1-15. That is what the human eye can see.
A typical JPEG photo compresses that range. You lose 1-3 and 13-15. The result is no detail in the shadows and blown highlights in a typical high contrast scene. With a RAW image file you only lose about one number off of each end.
Creating a true HDR image requires you to mount your camera on a tripod and take 3-7 photos in RAW format at different shutter speeds while keeping the aperture setting the same. Most DSLR’s have an exposure bracketing mode which makes this quite simple. My typical setting is -3, -1, 0, +1, +3. The underexposed photos contain the highlight detail and the overexposed ones contain the shadow detail.
An HDR processing program like Photomatix combines all those images into one giving you detail in both the shadows and the highlights. Here is an example from Anza Borrego Desert State Park:
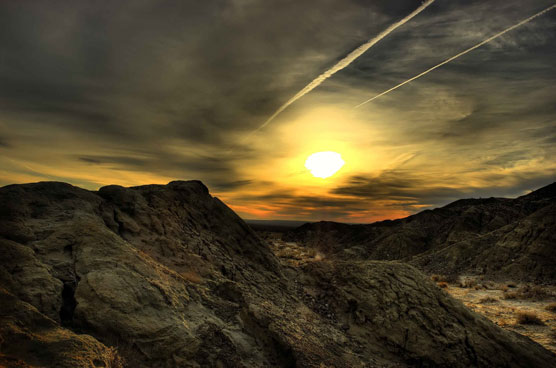

Obviously you won’t have detail in the sun but this has the full 1-15 range.
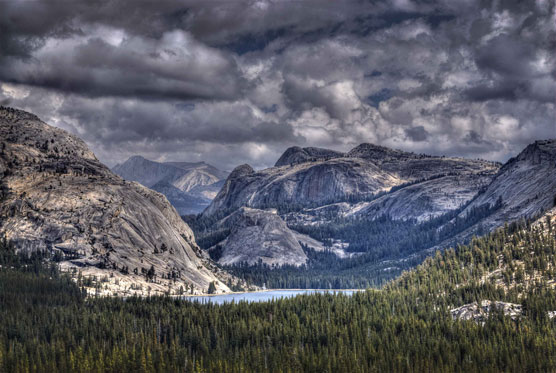
Photomatix also allows you to create a pseudo HDR image using just one RAW file. That is what I did for the Yosemite photos. There are lots of adjustments you can make to vary the final look. It’s a fun program and I highly recommend it.
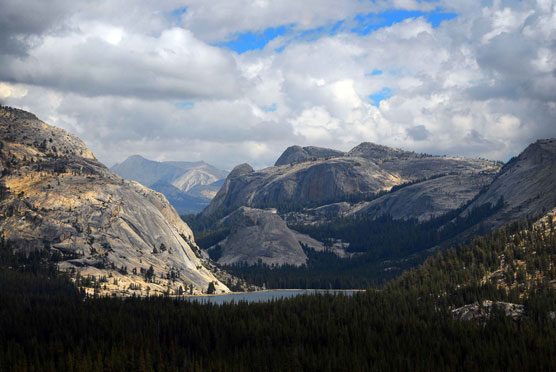
My old Nikon D200 has a setting where I can take a JPEG and a RAW photo at the same time. Below are photos of Tenaya Lake, one “normal” and one HDR.


Newer Nikon cameras have a setting called “active lighting” or something like that which attempts to do the same thing. Hey, if anyone from Nikon is reading this I could sure use a new D4x and some nice glass…
You can learn more about HDR photography here: http://en.wikipedia.org/wiki/High_dynamic_range_imaging
Regards, Park Ranger
One Reply to “HDR Photography”
Visit full-site to leave a comment
Excellent tips, thank you so much. Your website is an invaluable resource for all my campout plans.